Authors: Lauren Chapman Ruiz
Posted: Sun, February 23, 2014 - 5:32:11
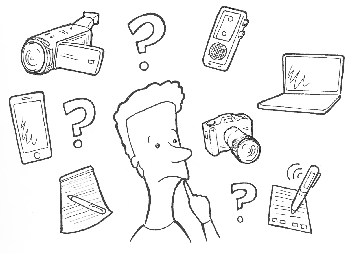
How you choose to conduct and capture your research will greatly impact your outcomes, and ultimately your client outcomes. I’m going to highlight a variety of research-capturing tools, and then I’ll have a future post about how to effectively videotape research. Both the type of research you’re conducting and its purpose will help you decide which capture method is best.
Before we begin, I wouldn’t recommend going into research alone—you will struggle to document while maintaining a conversation. A good structure is to have a moderator and a note taker, that way one practitioner can focus on conversing with the participant, while the other focuses on capturing what is occurring.
Note-taking
Your options here are to take notes by hand, or to capture on a device such as a tablet or laptop. If you’re taking notes by hand, then you need to make sure you can return to those notes and understand what they mean. This will rely heavily on your memory when you spend time typing up your notes. On the flipside, your participants will likely be very open to speaking freely, knowing his or her voice and image aren’t being captured.
If you choose to type into a tablet or laptop, you will cut down the time of typing your notes later, but you’ve now introduced technology into your research encounter. If it’s important to have detailed, word-for-word notes, then transcribing with a laptop in the interview can be highly successful, and time-saving. The best practice here is to have the note taker remain in the background, quietly typing on a small laptop. He or she is tucked away to minimize distraction, keeping the interview focused on the moderator/participant conversation.
Audio recording
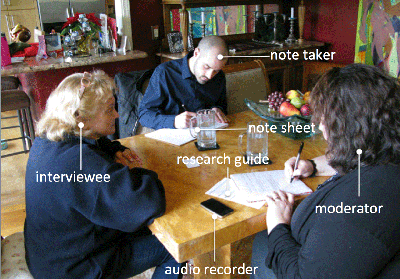
Audio recording is minimal in its invasiveness, and provides a word-for-word backup of everything you heard. It’s a safety net for your written notes or your memory—and a way to verify that what you captured is correct. If you’re trying to capture a complex process, you can reference the audio to ensure it’s correct. Audio can be provided to your stakeholders, and can be used to pull out compelling clips, allowing them to hear the support for your findings. There are a range of devices that can be used to record, from small pocket recorders to iPhone apps such as Voice Record Pro or iRecorder.
Make sure you don’t cross any ethical boundaries with audio recording—always inform your participants if you’re recording, and let them know what will happen to the information. This should be done in the form of a consent form prior to starting the interview.
Note-taking with audio recording
A research tool that captures word-for-word discussions and minimizes distraction is the Livescribe pen. This lovely piece of technology appears to be good old-fashioned paper and pen, but it is actually recording all audio to the pen and codifying it to the paper. Tap the pen to a sentence in your notes, and it will play exactly what was said in that same moment. It will also send a video of your notes, recorded stroke by stroke, with audio included, to your computer via Bluetooth. If you’re using a tablet, programs such as Microsoft OneNote and AudioNote will capture audio while you type or sketch with a stylus.
Screen capture with participants
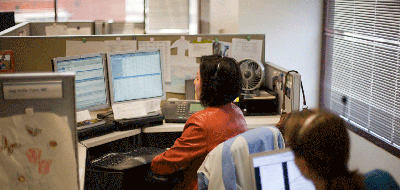
In the case of usability research, you’re trying to capture a variety of actions occurring at the same time. You want to see where a participant clicks or touches on the user interface, you want to capture what pathways they take through the system, along with what they’re saying and their facial reactions. That’s a lot to manage. Luckily for us, there are some handy tools such as Silverback or Morae, which record the device screen, highlight clicks, and record the participant with audio.
Unfortunately, for mobile usability, capturing gets more difficult. There are some apps that let you record the device screen, such as Reflector, but you don’t get the taps or swipes. If you jailbreak the phone, Cydia has applications that will record the user actions. Another option with which I’ve had success is building a mobile camera mount (external camera rig) to capture the participant’s actions, but you will then have a clearly visible mount.
Video recording
When conducting research in context, you’re gathering more than just what is said; you’re also gathering critical observations about the space around the participant, the participant’s behavior, the programs that are used, the forms completed, the tools used, the sticky notes with reminders, and the “duct tape” (fixes and workarounds people makes for themselves). In this environment, visuals are incredibly important. As the famous anthropologist Margaret Mead said:
“What people say, what people do, and what they say they do are entirely different things.”
And what better way to capture this trichotomy than video? In most cases, the only way to document actions is through video, with photography as a supplement. This is essential in usability testing, contextual inquiries, and observations.
In addition, video is a powerful way to share your research with others—especially stakeholders who may have a hard time seeing what their users experience. Nothing makes a bigger impact than having clients hear and see the research participants directly. However, the price you pay in using video is you may never truly be sure that participants are comfortable and acting naturally.
Tune in next time for tips and tricks on how to use video effectively in research.
Posted in: on Sun, February 23, 2014 - 5:32:11
Lauren Chapman Ruiz
View All Lauren Chapman Ruiz's Posts





Post Comment
@ian (2016 12 14)
You can screencast the iOS device to your PC, then use My Screen Recorder to record the iOS screen displayed on your PC. My Screen Recorder is one of the best screen recording software. It records your screen and audio from the speakers or your voice from the microphone - or both simultaneously. The recordings are clear and look great when played back on your website, uploaded to YouTube or used in your presentation. One thing often overlooked - It will record directly to standard compressed format that works with any video editor or any tool, no conversion required. And, the file sizes are small, making them easy to upload or distribute.
http://www.deskshare.com/screen-recorder.aspx
@run 3 (2025 01 22)
This game is great and fun. If you’re bored run 3, play this board game on this platform without downloading or signing up.
@Block Game (2025 06 19)
This is a helpful overview of research capture methods! I like how it covers different options from old-school note-taking to high-tech screen recording. Definitely some good food for thought for my next user research project. Thanks for sharing!Block Game
@williamseo (2025 06 25)
I’ve played on many sites, but only on WENGTOTO my withdrawal has never been delayed. It’s really great, all processes are transparent and smooth. The admin is also responsive and friendly. It’s really worth it! wengtoto
@williamseo (2025 06 27)
Baru coba daftar di Rajabandot, langsung menang di slot gacor! Web-nya user-friendly banget. Mantap pokoknya! rajabandot login
@williamseo (2025 06 28)
Salut buat Rajabandot! Pelayanan cepat, fitur lengkap, dan terbukti membayar hadiah terbesar. Saya tidak ragu lagi untuk menjadikannya pilihan utama bermain togel online. rajabandot login
@williamseo (2025 07 02)
Sudah banyak tempat saya coba, tapi Rajabandot tetap jadi pilihan utama. Jelas, terpercaya, dan benar-benar profesional. Tidak pernah kecewa sejauh ini. Terima kasih! rajabandot login
@williamseo (2025 07 02)
RAJABANDOT LINK RESMI AMAN banget, bro! Udah terbukti gak ada gangguan, koneksi stabil, dan gak bikin khawatir data bocor. Recommended buat yang baru mau coba juga. rajabandot login
@williamseo (2025 07 03)
Gak nyangka ada situs togel yang kasih minimal deposit serendah ini. Cuma 10 ribu, semua kalangan bisa ikut main. Bonus deposit 5% juga bikin tambah semangat! rajabandot login
@williamseo (2025 07 07)
I’ve seen a big difference since I decided to buy TikTok likes for my videos. It helped increase my reach and gave me the motivation to post more often. Just make sure you’re using a trusted service to avoid fake interactions that could hurt your account in the long run. https://hyppesocial.com/
@williamseo (2025 07 14)
La opción de Buy eSIM facilita mucho la vida a los usuarios modernos. Ya no tienes que buscar tiendas físicas al llegar a un nuevo destino, ni preocuparte por tarifas de roaming. Todo se gestiona online, rápido y sencillo, y puedes comparar precios de diferentes proveedores desde tu móvil. Pedir eSIM
@williamseo (2025 07 19)
Get bay smokes online with Best Prices in all over the world .
@Jimmy (2025 07 30)
Estou curtindo muito a experiência no 65x.com. A plataforma tem jogos variados e licenciados, além de um bônus generoso que me ajudou a explorar bastante. A segurança SSL me passou muita confiança, assim como os elogios no Reclame Aqui. 65x bet
@pioneerseo (2025 08 02)
Quem curte torneios VIP precisa conhecer a 68S. Muito acima da média! 68s bet
@Jimmy (2025 08 02)
Já testei vários cassinos online, mas o 85F impressiona com sua licença internacional e jogabilidade ao vivo com total segurança. 85f
@pioneerseo (2025 08 04)
오피스타에서 2025년 전국 오피스텔 비교, 후기, 예약, 힐링 서비스를 빠르고 쉽게 확인해보세요. 강남, 부산, 인천 등 지원. 오피스타 도메인
@pioneerseo (2025 08 04)
역삼오피 정보를 항상 최신화하고 순위시스템으로 효율적으로 관리하여 오피 정보를 확실하게 제공하는 국내 최고의 정보 포털 사이트입니다. 지역별로 오피 업체를 ... 오피스타
@williamseo (2025 09 04)
Saya melihat rajabandot mulai banyak dibicarakan di berbagai kalangan, terutama mereka yang suka mencari informasi terbaru. Ada daya tarik tersendiri yang membuat orang ingin tahu lebih banyak. Mungkin ini akan menjadi tren besar. rajabandot login
@wplace tool (2025 09 14)
This primer on capturing research is so helpful! I especially liked the reminder about how filming might influence conversations. It’s a great guide for designers like me to improve our methods wplace tool.
@Pips NYT (2025 09 14)
Great post on research methods! I found the part about balancing note-taking and filming to avoid missing details really helpful. It’s so true that how we capture data affects outcomes.Pips NYT Unlimited