


Authors: Lauren Chapman Ruiz
Posted: Wed, March 19, 2014 - 1:00:17
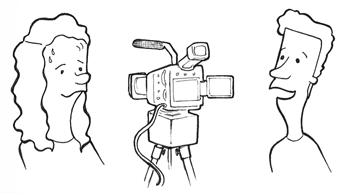
In our last post, we explored a variety of methods for capturing user research. Yet a question lingered— how can you effectively use video in your research without influencing the participants?
Here are some tips and tricks to minimize the impact of using video in research engagements. Keep in mind, these tips are focused on conducting research in North America—the rules of engagement will vary based on where you are around the world.
Be transparent
If you’re using a recruiter, ensure they let participants know that they will be video recorded. Usually you or your recruiter develop a screener—a set of questions that are used to determine whether a potential participant is qualified for a study. As part of the screener introduction, you should include the intention to video record the research visit, which gives your participant time to express any concerns. You don’t want the participant to be surprised when you pull out a video camera, especially if the topic being discussed is very personal.
Minimize equipment
With the improvements in technology, you shouldn’t be using a large video camera. Keep the recorder as small as possible, and use a tabletop tripod. (I recommend a Joby Gorillapod due to its flexibility.) Placing your equipment on a table allows you to keep the camera discreetly in the background while allowing easy pickup and placement if necessary.
Prep everything beforehand
Nothing calls more attention to video than technical difficulties. You don’t want to be fiddling with the camera, or checking it during an interview. Make sure all batteries are fully charged, and bring spares. Make sure your memory card has enough space. Either have the small tripod on the camera beforehand, or make sure it’s ready to install. If you run into a problem in the middle of the interview, ignore the issue and just focus on the engagement—this is what’s critical—and always have that pen and paper handy.
Ease participants in while building rapport
As you are introducing the research, remind participants that it will be video recorded, review what the video will be used for, and assure them of the purpose. If you’re recording only for note-taking purposes, explain that you simply can’t remember everything that’s said, and video allows you to go back and verify information. Remind them that they are in control of what is or isn’t recorded, and that it can be stopped at any time. If the expectation of your video recording has been communicated correctly during recruitment, this information shouldn’t be a surprise, and your interviews should progress smoothly. This is when you can also request signed consent for the recording regarding when, where, and how the footage will be used. How you do this will vary based on what you plan to do with the footage.

Include the participant in the process of setup
Part of building rapport with participants is allowing them to see you setup your equipment—let them see where you place the camera and set it up to capture a clear angle. Spend the necessary time for your participant to become comfortable with the equipment, and answer any questions.
Use humor to help dissipate discomfort
Oftentimes humor can help to ease any nervousness about being recorded. As you build rapport, be lighthearted about the fact that you’re recording. A light chuckle can help to relax the situation.
Consider the audio quality
If you’re making a high-quality video reel for your stakeholders, you may need to ask your participant to wear a microphone. This will guarantee quality audio much more than using a directional microphone or relying on the camera’s capabilities. In these situations, participants should be more aware of the situation while being recruited so there are no surprises.
Keep the focus away from the camera
Once you’ve finished your setup and you start recording, try to forget the fact that a camera is on. Still write down notes—this distracts attention from the camera, and gives you a backup of what was said and when, which is helpful when you go back to the video later. If your participant gets up and takes you on a tour, pick the camera up and hold it against your body—place it low on your body so that it’s not very noticeable. This will keep the footage steady, and the camera out of the way. If the camera is treated as a casual aside, then attention will be drawn away from the fact that it’s recording.
If unsure, ask for permission
During your interview, if you’re not sure whether you can record something in particular, always ask your participant for permission first. Your participant might be nervous to show you particular information while you’re recording, but by asking for permission first, this reminds them that they have control of the situation. Yes, this draws attention back to the fact that you’re recording, but when your participant feels in control of what is being captured, this will build confidence and trust in allowing you to continue recording.
Be willing to show an example
In some situations, participants have felt reassured when they see the quality of the video that is captured. If video quality isn’t essential to you, showing your participant that the footage captured is low-res can increase trust to record potentially sensitive visuals.
Stop any time
Don’t be afraid to turn off the video camera if it’s clearly a distraction or is preventing the participant from being open and honest. Make sure they know you can turn it off if they are uncomfortable. Just always be ready to switch to an alternative capturing method.
Wrapping up
If you feel your participant may have been nervous to say something due to the camera, at the end you can always turn the camera off, and ask if they have anything else they’d like to share.
Now that you have hours of video footage, what do you do with it? Based on the type of consent you gathered, there are a variety of outputs you can use the footage for.
I recommend a quick and dirty highlights reel of key findings. You can save time if you’re diligent with taking written notes of key moments, or marking down the time stamp if your note taker is sitting back with the camera. Cut these key moments out with a basic program, such as Quicktime or iMovie, for easier compilation. A good length of time for a highlights reel is about 5 minutes—if it’s too long, you will lose attention.
You now have footage that you can reference if something wasn’t clear to you, or if you need to verify a vague memory. If a stakeholder challenges an insight you’ve presented, you can reference the video as evidence. The footage can also be provided to your stakeholders as raw data with your synthesis. It’s footage they invested in, and it can be kept for any future needs.
We’ve gone through various methods for capturing research, and focused on how to leverage video without disrupting your participant engagement. As technologies advance, we can limit the appearance of being recorded—imagine recording research with Google Glass—but always we need to ask, what is the risk that we might alter participant behavior?
What do you think?
I’d be thrilled to hear about how you decide to approach capturing research—what tools do you love to use? What tips or tricks do you have to put participants at ease? Have you tried anything new or did something surprise you?
Posted in: on Wed, March 19, 2014 - 1:00:17
Lauren Chapman Ruiz

View All Lauren Chapman Ruiz's Posts


Post Comment
@Jelyn (2024 07 09)
When you take out the video camera, especially when the subject being addressed is highly personal, you don’t want the participant to be taken aback. See: concrete workers near me
@williamseo (2025 02 24)
Eat-and-run Hill is the number one community in Korea that provides the latest data to diagnose the safety of Toto sites and systematically supports anyone to easily and simply verify eat-and-run sites. 먹튀사이트
@williamseo (2025 03 07)
Discover expert paramedical tattooing, facials, scar camouflage, Brazilian stretch mark tattoo services, microneedling, body wraps, dermaplaning, chemical peels, and more at Imagine. Areola tattoo